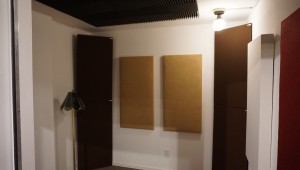
The 9′ x 9′ x 8′ high room is (according to the experts) probably the worst shape you can have acoustically speaking (a cube), but with some good treatment from GIK and ATS, the sound inside is what I would describe as “neutral” for vocal and instrument work. It is not overly dead, nor is it reverberant. Hopefully it will sound good as a drum room as well.
 |
 |
 |
 |
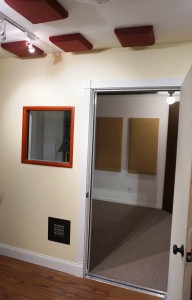
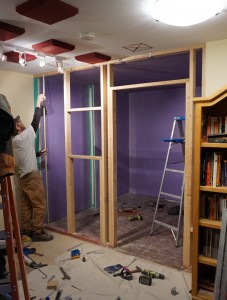
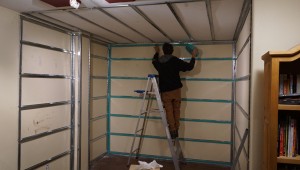
The area was originally a corner alcove that was open on one side. The left and rear interior walls back up to the house stem walls (as this is in a walkout basement), and the right wall is adjacent to the bathroom. We added a layer of 5/8″ Soundbreak board over the existing drywall to all three walls and the ceiling, using RC-1 resilient channel and soundproofing foam tape from SoundProofingSale.com to provide a buffer and air gap between the new and existing drywall.
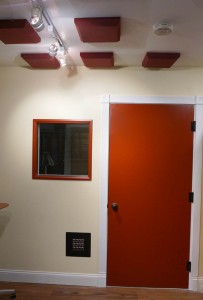
A new front wall was constructed for the window, door, and patch panel, using wood frame and Soundbreak on both the interior and exterior of the frame, with sound proofing foam tape between the drywall and wood. We used 2″ rock wool fiberglass from Home Depot for insulation. Mike Miller constructed the wall and put up the drywall.
Soundbreak is very heavy gypsum board that is used as a replacement for standard drywall for sound studios, apartments, etc. It weighs about 86 lbs. per sheet, and is quite expensive ($70.00). It has an excellent STC (Sound Transmission Class) rating of 53 – 60 when installed over both sides of a wood frame. We obtained this material, along with oodles of sound-proofing caulk, from a local Grand Junction vendor, Pioneer Materials. The floor is simple utility carpet and pad from Home Depot, over vinyl and concrete.
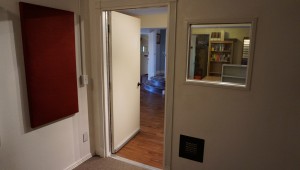
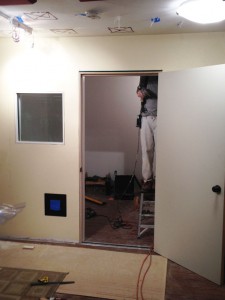
The window consists of two panes of laminated glass, one 1/4″, and one 3/8″, set into a shallow V-shape, with about a 3/4″ to 1″ air gap between them. We used Rod Gervais’ book, “Home Recording Studio – Build It Like The Pros” for guidance on door and window construction.
The door itself is a very heavy solid core, 1 and 3/4″ thick, from Home Depot, with a door seal kit and threshold drop seal from Acoustical Solutions. Ron Standing made the window, built the door jamb, and installed the door and sealing kit. Because of the precise specifications needed for sound attenuation, this was a lengthy process covering several weeks.When the door is closed, the drop seal falls into place to seal the threshold and door bottom so that sound cannot leak under the door. The door jamb has rubber seal material attached to an aluminum backing. You know its pretty air tight when you close the door because you can hear the air squeezing out. It takes a bit of effort to close the door, which is good.
The patch panel is a through-the-wall set of jacks for 8 XLR microphone input/outputs and 4 TRS line input/outputs mounted in a black metal panel. I obtained the custom built and labeled panels from Redco.com, and then made a wood mounting box. I soldered up each side of the panel to their respective jacks, requiring 72 connections. I am really glad I had the proper tools for this (hint: resistance soldering station).The edges of the box were sealed with acoustic caulk, and the box interior stuffed with rock wool fiberglass insulation. Ron had special metal trim plates made locally for both sides of the box, to help hold it in place and provide a nice border. He then cut a hole next to the door and attached the box to a stud, and sealed the edges.
The total cost of construction was about $7200, with $4470 for materials and $2730 for labor, spread out over 2 primary work men (Mike Miller and Ron Standing), as well as two assistants and a carpet person. In addition to being the general contractor, I built the patch panel and did all of the painting (the easy stuff!).
Given that a similar-sized pre-fab isolation booth from WhisperRoom.com can cost from $10,000 to $20,000 plus shipping, this is a pretty good cost savings. The only thing missing is ventilation. Smaller booths require this, but given that the talent will be recording for short durations for the most part, the door does not have to remain closed for more than 15 or 20 minutes. Adding a vent system similar to that found in the DawBox.com design still may happen, but I did not want to risk compromising the sound isolation unless absolutely necessary.
The iso-room will help cut down on street and aircraft noise, which occasionally is an issue here. There is no such thing as “sound-proofing”, but with the ability to attenuate sudden rumbles or loud jet noises will improve our recordings and cut down on re-takes.
Next up, I will be doing some SPL measurements inside and outside of the booth to chart just how well we are doing at sound attenuation.
 |  |


Speak Your Mind